Capture the Magic: How to Film Roller Coasters for Stunning Visual Content
Most people think any seat on a roller coaster works for filming. The truth is, your choice of roller coaster seating shapes the story your camera tells. From front row views that capture every twist to back row thrills that show raw speed, knowing where to sit changes everything about your cinematic ride experience. Keep reading to find the best seats on thrill rides and tips on how to film roller coasters like a pro. For tips and tricks on filming, check out this guide.
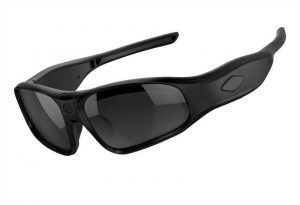
If you love riding roller coasters, these video camera sunglasses are a must have!
Choosing the Right Seat
Deciding where to sit on a roller coaster can completely change your ride. It’s more than just a seat; it’s the perspective that defines your entire cinematic ride experience.
Front Row Thrills
Sitting in the front offers unmatched views. You get to see every twist and turn before anyone else. This seat gives you a clear, sweeping view of the track ahead. When filming, this is the ideal spot for capturing those dramatic first drops and sharp turns. The excitement builds as you approach each element, making viewers feel like they’re leading the charge.
You also capture the rising anticipation of the ride. Every slow climb, every moment before the drop, is yours to showcase. Want to give your audience the feeling of being right there with you? The front is where it’s at. It’s the place for those who want their footage to capture the full scope of the ride’s design.
Back Row Adrenaline
The back row is where you feel the ride’s full force. It’s not just about the view; it’s about the speed. This seat offers a different kind of thrill, one that emphasizes acceleration and momentum. As the last car over the peak, you get whipped around bends, making your footage dynamic and fast-paced.
Filming from the back captures the ride’s raw power. It’s perfect for showing the speed and intensity that these rides are known for. If you want your viewers to experience the ride’s adrenaline-pumping rush, the back row is your choice. It’s all about the thrill of the chase as you barrel down the track.
Middle Seat Dynamics
The middle seats offer a balanced perspective. You’re in the heart of the action, experiencing a blend of both front and back sensations. It’s the sweet spot for capturing the overall coaster experience. Here, you get a steady view that combines the anticipation of the front with some of the speed of the back.
Filming from the middle gives a comprehensive feel. It allows you to show the ride’s full layout without the extreme dynamics of the front or back. This is where you can get creative with angles, capturing both the ride and the reactions of those around you. It’s a unique perspective that can offer a well-rounded view.
Filming Techniques for Coasters
Once you’ve chosen your seat, it’s time to focus on filming techniques. You’ll want to prepare with the right gear and know-how to keep your footage smooth and engaging.
Essential Equipment
Selecting the right equipment is key. A compact camera or a smartphone with good video capabilities is a must. Consider using action cameras, which are designed for fast movements and can handle the bumps and jolts of a roller coaster. A sturdy mount or harness is also important to keep your device secure throughout the ride.
Don’t forget to bring extra batteries or power banks. Rides and queues can take time, and you don’t want to miss a moment due to a dead battery. With the right tools, you can focus on capturing the thrill without technical interruptions.
Stabilization Tips
Smooth footage keeps viewers engaged. To achieve this, stabilization is crucial. Many cameras have built-in stabilization features, but additional support can help. Consider using a gimbal or a handheld stabilizer to reduce shakiness.
Keep your movements steady. Try to hold your camera close to your body, reducing the impact of jolts. Practicing your technique off the ride can make a big difference. Smooth footage is more pleasing to watch and captures the essence of the ride better.
Creative Angles
Angles can transform your footage. Experiment with different positions to capture unique perspectives. Try filming over your shoulder or at a slight tilt to add drama. Capture the expressions of fellow riders for a touch of human emotion.
Mix up your shots. Wide angles can show the track’s vastness, while close-ups can highlight the ride’s intricate details. By varying your angles, you create a more dynamic and engaging video.
Capturing Cinematic Ride Experience
Your goal is to create not just a video, but an experience. Timing, framing, and lighting all play vital roles in this process.
Timing Your Shots
Timing is everything in filmmaking. On a roller coaster, this means knowing when to hit record. Start filming before the ride begins to capture the atmosphere and anticipation. Keep the camera rolling through the first climbs and drops for maximum impact.
Capture key moments. The most thrilling parts are often the drops and turns. Make sure your timing aligns with these elements to give your audience the most exciting view possible.
Framing and Composition
Good composition sets your video apart. Consider the rule of thirds to add balance to your shots. Position key elements along imaginary lines that divide the frame into thirds for a more pleasing visual arrangement.
Focus on both the ride and the surroundings. Incorporating scenery can add context and depth to your video. Ensure your subject is clear and the focus is where you want it. This attention to detail can elevate your footage greatly.
Lighting Considerations
Lighting can make or break a shot. Natural light is your best friend on outdoor rides. Film during times of day when the light is soft, like early morning or late afternoon. Harsh midday sun can cause glare and harsh shadows.
Watch for changes in lighting as the ride moves. Tunnels and shaded areas may require adjustments. Make use of your camera’s settings to adapt to different lighting conditions and maintain quality footage.
Optimizing Roller Coaster Views
You’ve got your seat and your camera setup. Now, let’s talk about optimizing what you see and record.
Best Seats on Thrill Rides
Finding the best seats is part of the adventure. While the front offers clarity and the back provides speed, each seat has its merits. Choose based on what you want to capture most. If the view is your priority, head to the front. If speed excites you, try the back.
Consider the ride’s design. Some coasters have seats that offer unique perspectives due to their layout. Research rides before your visit to know where the best views might be.
Strategic Seat Selection
Your strategy should include a plan. Think about the shots you want and how they fit into your overall video. Plan to ride multiple times in different seats for varied footage. This gives you more material to work with in editing.
Be flexible with your choices. Lines and availability might alter your plans. Have a backup seat in mind to ensure you get the shots you need.
Enhancing Visual Content
Enhancing your footage in post-production can add polish. Use editing software to adjust colors, stabilize footage, and add effects. Enhance sound to make the experience more immersive. A well-edited video can transform raw footage into a cinematic masterpiece.
Share your work with communities passionate about rides and filming. Engage with fellow enthusiasts on platforms like YouTube or TikTok to gather feedback and inspiration.
Amusement Park Tips for Filmmakers
Beyond the ride itself, there are other factors to consider when filming at amusement parks.
Planning Your Visit
Preparation is key to a successful shoot. Research park maps and ride schedules ahead of time. Consider the weather and time your visit for optimal conditions. Arrive early to beat the crowds and secure the best seats.
Pack wisely. Bring essentials like a hat, sunscreen, and snacks to stay comfortable. Make sure your gear is ready and accessible for easy filming.
Safety Precautions
Safety should always come first. Follow park rules and regulations regarding filming equipment. Secure your camera properly to prevent accidents. Be mindful of other guests and staff.
Avoid filming on rides where it is prohibited. Some parks have strict policies, so always check before you start recording. Your safety and the safety of others is paramount.
Post-Production Advice
Editing is where your footage comes to life. Use software to cut and arrange your clips, adding transitions and effects. Balance audio levels to ensure clear sound without overwhelming your visuals.
Consider sharing your final video with online communities. Platforms like Reddit and Facebook offer spaces to connect with like-minded creators. Engage with others to improve your skills and gain new insights.
By following these steps, you can transform a simple ride into an unforgettable cinematic experience. Whether you’re capturing the thrill of the front row or the rush of the back, your video will stand out and captivate your audience.
Have you tried using these video camera sunglasses?
Why Camera Sunglasses Are Great for Hiking, Fishing, Cycling and Outdoor Adventures
Why Camera Sunglasses Are Great for Hiking, Fishing, Cycling and Outdoor Adventures The best outdoor memories aren’t always the ones you plan to record. Sometimes they happen while you’re walking down a trail. Sometimes you’re standing beside a lake when something unexpected happens. Sometimes you’re riding your bike through a beautiful stretch of countryside. Sometimes you’re exploring somewhere you’ve never been before. The problem is that traditional cameras aren’t always convenient when […]
The Advantage of Removable MicroSD Storage Over Built-In Smart-Glasses Storage
The Advantage of Removable MicroSD Storage Over Built-In Smart-Glasses Storage When you’re shopping for video camera sunglasses, it’s easy to focus on camera resolution, frame rates and lens quality. But there’s another specification that can make a huge difference in everyday use: How the video is stored. Some smart glasses rely on built-in storage. That can be convenient, but you’re ultimately limited to the storage capacity provided by the device. Dedicated camera […]
Meta Glasses Alternatives: 10 Things to Consider Before You Buy
Meta Glasses Alternatives: 10 Things to Consider Before You Buy If you’ve been searching for Meta glasses alternatives, you’ve probably already discovered that there are a lot of different camera glasses and wearable cameras available. Some are designed as smart glasses. Some focus primarily on photography. Some are built around AI. Others are designed specifically for hands-free video recording. That can make choosing the right pair surprisingly difficult. Before you buy a […]
Why Interchangeable Lenses Matter When Choosing Video Camera Sunglasses
Why Interchangeable Lenses Matter When Choosing Video Camera Sunglasses When shopping for video camera sunglasses, most people immediately look at the camera resolution, battery life, storage capacity, and recording time. Those specifications are important, but there is another feature that can make a major difference in how useful your camera sunglasses are: interchangeable lenses. Being able to change the lenses can make a pair of video camera sunglasses much more versatile for […]
daVideo Camera Sunglasses vs. Meta: Which Is Better for Long Recording Sessions?
daVideo Camera Sunglasses vs. Meta: Which Is Better for Long Recording Sessions? If you want to record hands-free video for more than just a few quick clips, the type of camera glasses you choose can make a big difference. daVideo camera sunglasses and Meta smart glasses are designed with different priorities in mind. Meta glasses combine a camera with smart features such as audio, voice interaction and smartphone connectivity. daVideo camera sunglasses […]
Why Choose Dedicated Video Camera Sunglasses Instead of Meta Glasses?
Why Choose Dedicated Video Camera Sunglasses Instead of Meta Glasses? Smart glasses have become one of the most talked-about wearable technologies in recent years. Meta glasses have helped bring camera-equipped eyewear into the mainstream, giving people a convenient way to take photos, record video, listen to audio, and use AI features without reaching for their phone. But there is an important question that many shoppers should ask before spending several hundred dollars: […]
Finding the Perfect Seat for Stunning Videos on Kings Island Rides
Finding the Perfect Seat for Stunning Videos on Kings Island Rides Picking the wrong seat on Kings Island rides can turn your video footage from thrilling to forgettable. You want the best camera angles that capture every twist, drop, and turn in crisp detail. This guide reveals the optimal seating positions to help you film the most striking attraction views, from front-row seats that put you right in the action to middle […]
How to Use Gimbals and Camera Settings for Perfect Kings Island Footage
Ride Filming Tips: How to Use Gimbals and Camera Settings for Perfect Kings Island Footage Capturing smooth footage on fast-moving Kings Island rides feels impossible if you don’t know the right tricks. Shaky, blurry videos can ruin the thrill you want to share with friends. This guide breaks down simple ride filming tips, from gimbal use to camera settings, so your footage stays steady and exciting. Keep reading to learn how to […]
Capture Your Kings Island Adventure
Filming at Amusement Parks: Capture Your Kings Island Adventure Most people think capturing a day at Kings Island means endless footage that never gets watched. The truth is, short-form videos win attention when you know the right moves. With the right Kings Island video tips and short-form video strategies, you can turn thrilling rides, tasty food, and fun moments into clips that pop on social media. Ready to film at amusement parks […]
The Best Tools for Adventure Photography
Capture Memories Effortlessly: The Best Tools for Adventure Photography Capturing every thrilling moment of your adventure shouldn’t mean missing out on the fun itself. Too often, stopping to snap photos pulls you away from the excitement around you. This post will show you how memory capturing tools like hands-free cameras and smartphone shortcuts let you document experiences without losing touch with the action, helping you stay present and truly enjoy every laugh, […]
Unforgettable POV Moments on the Top Rides in Amusement Parks
Capture the Thrill: Unforgettable POV Moments on the Top Rides in Amusement Parks Forget what you think you know about thrill rides. The rush isn’t just in the drop or the speed—it’s in seeing it all through your own eyes. The best POV attractions at amusement parks turn every twist and turn into an immersive experience you won’t forget. Keep reading to find the top rides that deliver heart-pounding moments and the […]
Videography Tips for Kings Island’s Wildest Drops
Adrenaline Rush on Film: Videography Tips for Kings Island’s Wildest Drops Some roller coasters at Kings Island deliver drops so wild they steal the show. If you’re chasing that adrenaline rush and want your footage to capture every scream and heart-stopping second, you need to know where to focus your lens. This guide shares videography tips to help you film the most thrilling drops with angles and effects that turn your shots […]
Leave A Comment